B2Proxy allows you to quickly extract and use dynamic IPs through a simple username/password authentication method. This article will provide a detailed guide on the complete process of obtaining proxies via Username: Password in the dashboard, helping you get started quickly.
I. Basic Setup Steps
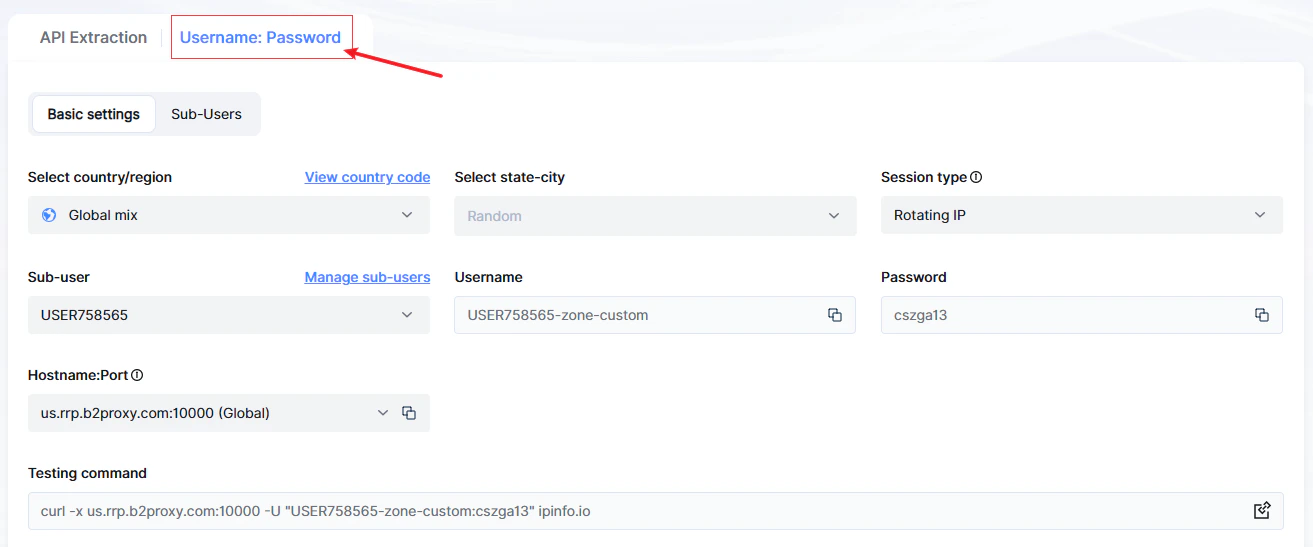
1. Select Proxy Location
Country/Region: Choose from the list (e.g., US).
State/City (Optional): Refine location (e.g., Los Angeles, California).
2. Set Session Type
Rotating IP: Auto-rotates IP per request (ideal for scraping/data collection).
Sticky IP: The IP remains fixed for a period of time (5 minutes by default), suits account management).
When selecting a sticky IP, choose “Yes” in the [Change IP in Advance] option to allow the system to automatically switch the IP earlier based on its actual available time.
If you choose “No,” the IP will remain unchanged during the sticky session and can only be switched after the session ends.
3. Bind Sub-User
Select an existing sub-user or create one to assign proxy permissions.
4. Select Hostname
Based on your network IP, select the nearest server. You can also manually choose other nodes.
II. Proxy Generation & Testing
5. Test Connectivity (Optional)
Run in Command Prompt:
curl -x host:port -U “username:password” ipinfo.io
(Replace with your testing command)
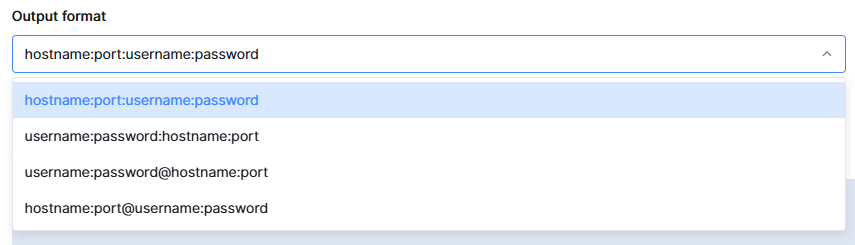 Proxy information usually includes: Host, Port, Username, and Password.
7. Set the Number of Proxies
 Enter the number of IPs needed (e.g., 100), click 「Generate」.
8. Get Proxy List
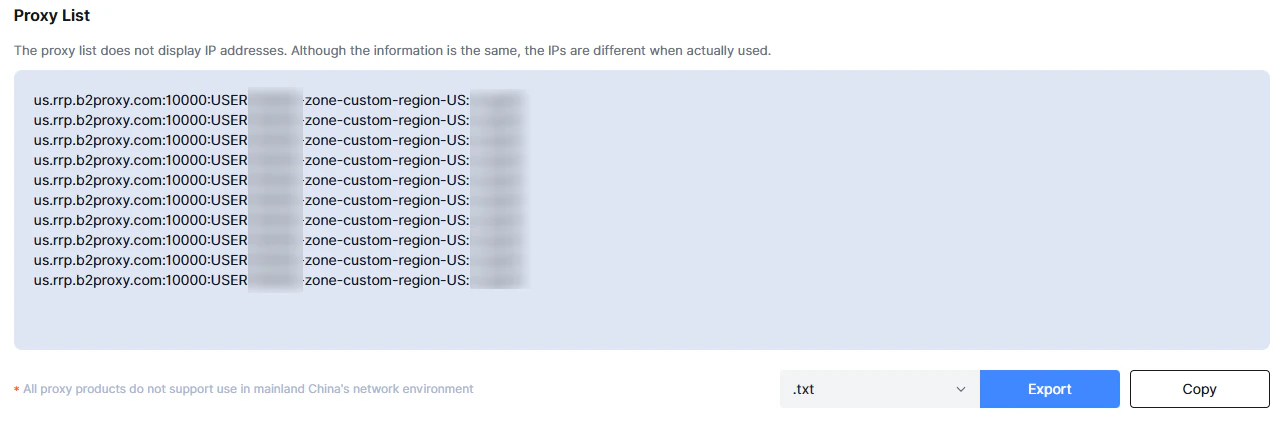 After generation, copy individual proxies from 「Proxy List」, or export as TXT/CSV for bulk use.
Security Recommendations
- Never share proxy credentials; reset passwords periodically.
- Assign sub-user permissions judiciously.