> ## Documentation Index
> Fetch the complete documentation index at: https://help.b2proxy.com/llms.txt
> Use this file to discover all available pages before exploring further.
# How to Use Unlimited Residential Proxies via APl Extraction?
B2Proxy supports the extraction of unlimited residential proxies via the **API method (authenticated by IP whitelisting)**, eliminating the need for usernames and passwords and offering a more secure and stable configuration. This article explains how to add whitelisted IPs and successfully extract unlimited residential proxies through the API, helping you quickly complete the setup and start using the service.
## I. Basic Setup Steps
### 1. Add IP Whitelist
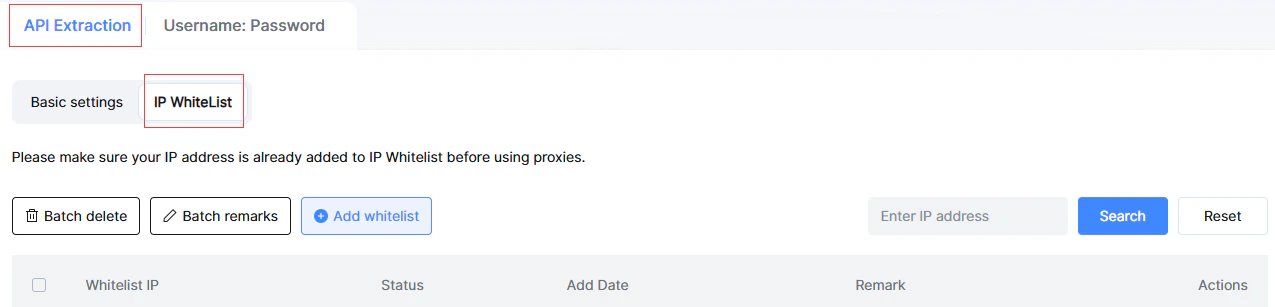 Go to "IP Whitelist", click "Add Whitelist", and enter the IP address of the network environment where you need to use residential proxies.
Note: API calls will be blocked for non-whitelisted IPs.
### 2. Set the Number of Proxies
Enter required number of IPs (e.g., 100).
### 3. Protocol & Format Configuration
Protocol: Default HTTP(S), optional SOCKS5.
Format: Default TXT (one IP:port per line), optional JSON.
Separator: Default line break.
### 4. Set Session Type
Rotating IP: Auto-rotates IP per request (ideal for scraping/data collection).
Sticky IP: The IP remains fixed for a period of time (5 minutes by default), suits account management).
When selecting a sticky IP, choose “Yes” in the \[Change IP in Advance] option to allow the system to automatically switch the IP earlier based on its actual available time.\
If you choose “No,” the IP will remain unchanged during the sticky session and can only be switched after the session ends.
### 5. Select Hostname
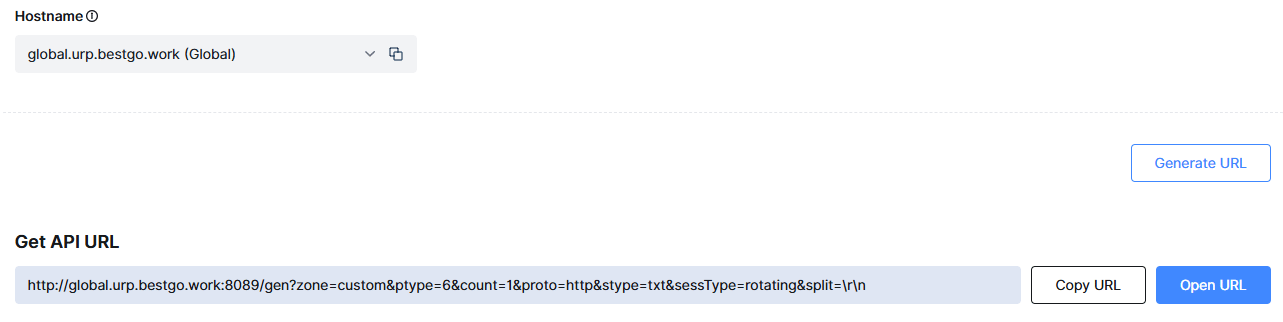
Based on your network IP, select the nearest server. You can also manually choose other nodes.
### 4. Generate API URL
Click 「Generate URL」 to get a unique API link.
Go to "IP Whitelist", click "Add Whitelist", and enter the IP address of the network environment where you need to use residential proxies.
Note: API calls will be blocked for non-whitelisted IPs.
### 2. Set the Number of Proxies
Enter required number of IPs (e.g., 100).
### 3. Protocol & Format Configuration
Protocol: Default HTTP(S), optional SOCKS5.
Format: Default TXT (one IP:port per line), optional JSON.
Separator: Default line break.
### 4. Set Session Type
Rotating IP: Auto-rotates IP per request (ideal for scraping/data collection).
Sticky IP: The IP remains fixed for a period of time (5 minutes by default), suits account management).
When selecting a sticky IP, choose “Yes” in the \[Change IP in Advance] option to allow the system to automatically switch the IP earlier based on its actual available time.\
If you choose “No,” the IP will remain unchanged during the sticky session and can only be switched after the session ends.
### 5. Select Hostname
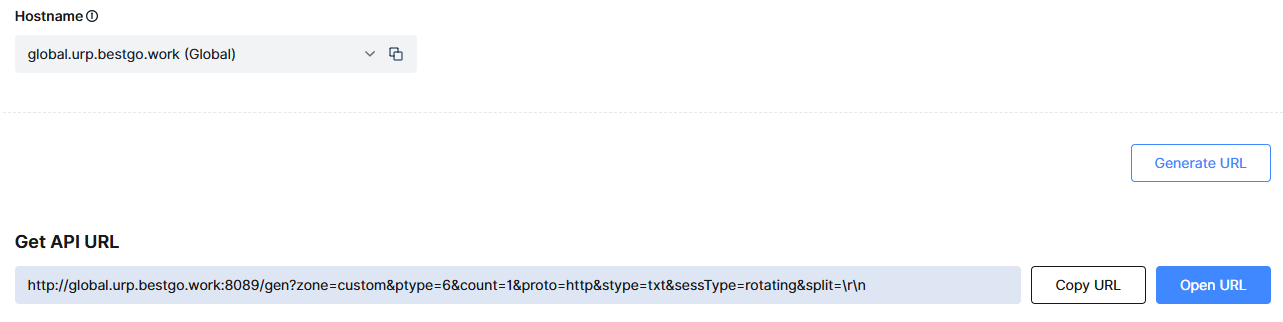
Based on your network IP, select the nearest server. You can also manually choose other nodes.
### 4. Generate API URL
Click 「Generate URL」 to get a unique API link.
 ## II. Call the API to Get Proxies
Open the API link in your browser or configure it in your tool. A correct response example would be:
1.1.1.1:8888
2.2.2.2:8888
…
If the following message appears, it means the whitelist was not added correctly. Please go back to step one and check.
```text theme={null}
IP Whitelist Check Failed
```
Rate Limit: 1 request/second.
Proxy Validity: 24 hours (default). Regenerate after expiry.
## II. Call the API to Get Proxies
Open the API link in your browser or configure it in your tool. A correct response example would be:
1.1.1.1:8888
2.2.2.2:8888
…
If the following message appears, it means the whitelist was not added correctly. Please go back to step one and check.
```text theme={null}
IP Whitelist Check Failed
```
Rate Limit: 1 request/second.
Proxy Validity: 24 hours (default). Regenerate after expiry.